High Country climate snapshot
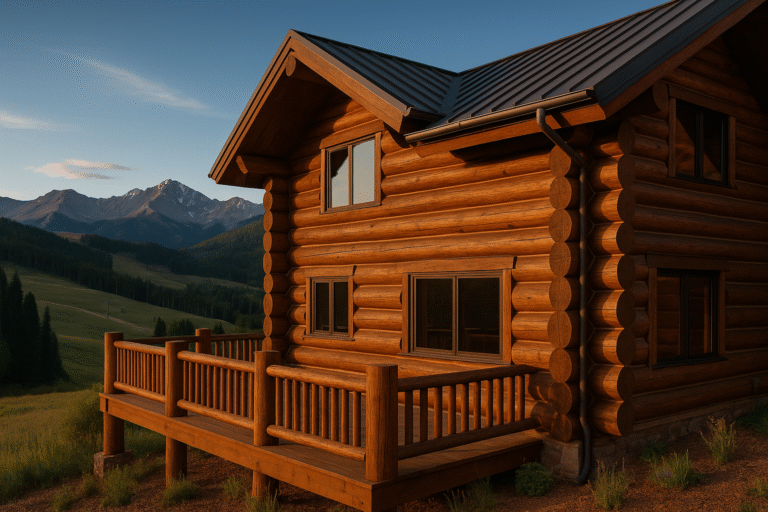
Mountain Village, Colorado sits in the San Juan high country. Elevation brings long winters, cold nights, and strong sun during the day. Snow stacks up, melts on warm afternoons, and re-freezes after sunset. That cycle opens checks in the logs, lifts weak coatings, and stresses chinking. UV at altitude breaks down pigments and clear coats faster than it would in lower valleys.
Inside, heated air stays dry while exterior surfaces stay cold and wet. That swing pulls moisture through checks and end grain. Without the right prep and coatings, you see peel, gray weathering, and soft spots at sills and log ends.
Mountain Village, CO – Common issues at 9,500+ feet
- Sun-faded south and west walls
- Peeling stain on windward elevations
- Open checks and drafts at corners and saddle notches
- Rot at trim, log ends, and deck-to-wall transitions
- Ice-dam splash staining on lower courses
Local log styles and materials
You see round lodgepole pine and Engelmann spruce on many builds. Custom homes often use hand-hewn square logs or timber-frame hybrids with log accents. Cedar trim and railings are common. Each material takes stain and preservative differently, so product choice and dry time matter.
Our Process for Long-Lasting Results
Inspection and moisture mapping
We start with a full exterior walk-around. We check clearances, grade, and splash zones. We probe soft areas, spot-test with a moisture meter, and note any heat-loss clues near corners and eaves. South and west walls get extra attention. Log ends, window sills, fascia, and posts are mapped for targeted work.
Surface prep that actually holds
Good outcomes start with clean wood. We select media blasting or sanding based on the current finish and fiber condition.
- Media blasting: Corn cob or crushed glass removes failed film and gray wood while protecting sound fibers.
- Sanding: Dialed-in grit sequence smooths the surface after blasting or when stripping isn’t required.
- Wash and neutralize: A log wash removes dust and opens pores. A pH-neutral rinse sets the wood for even color.
Cure windows are tight at altitude. We schedule coats to match temperature ranges and afternoon clouds so stain flashes and bonds right.
Repair and stabilization
- Consolidate: Epoxy stabilizers firm up soft fibers in localized spots.
- Splice: Dutchman repairs replace rotten sections with like species and profile.
- Check routing: Guiding checks reduces random cracking and gives sealant room to move.
Staining for UV and snow
Breathable systems perform well in the high country. We build color with two coats for even tone and UV load, then add a clear UV topcoat when the system supports it. South and west elevations often get extra attention or a deeper tone to carry the sun load. We watch dew point, wind, and sun angle to prevent lap marks and flashing.
Chinking, caulking, and air sealing
Chinking must bridge the joint and bond to two sides, not the back. We size backer rod correctly and apply elastomeric chinking that moves in freeze–thaw swings. Corners, saddle notches, and window perimeters get targeted air sealing to cut drafts without trapping moisture in the wall system.
Borate and preservatives
After blasting and before stain, borates help protect against rot in vulnerable zones. We focus on log ends, lower courses, and deck splash areas. End-grain sealer locks in protection where water wicks the fastest.
Seasonal Timing in the San Juans
Best windows for major work
Plan major blasting and staining from late spring through early fall. Daytime warmth and lower humidity help stain cure. Shoulder seasons can work, but we plan for shorter days, cooler mornings, and the need to pause when temps dip.
Winter checklists
- Watch for ice dams at roof valleys and near dormers.
- Keep snow off lower log courses and stacked against decks.
- Check chinking for cold-air leaks on north and west sides.
- Look for icicle splash marks on fascia and log ends after warm-ups.
Preventing Damage Before It Starts
Design and drainage details that matter
- Kick-out flashing at roof-to-wall stops runoff from soaking logs.
- Extend downspouts and pitch grade away from the structure.
- Maintain ground clearance. A stone skirt shields lower courses from snow splash.
Decks, railings, and stairs
Horizontal surfaces fail first. Keep decks clean. Recoat before water beads stop forming. Pay attention to deck-to-wall interfaces, post bases, and stair stringers. These zones see constant wetting and drying at altitude.
Windows, doors, and trim
End grain at sills and trim soaks up water. Seal exposed cuts and fastener heads. Confirm sill slope moves water away from log faces. Replace failing glazing or gaskets that pull cold air through in winter.
Attic and roof considerations
Ventilating the roof reduces warm-roof melt that drives ice dams. Air sealing the lid keeps moist indoor air out of cold roof cavities and away from log interfaces.
Product Choices That Work Up Here
Stain systems suited to alpine UV
Penetrating stains with strong UV inhibitors and breathable clear coats handle high-altitude sun and wide temperature swings. Color matters. Mid to darker tones often last longer on south and west walls than pale shades that wash out fast in strong light.
Sealants and chinking
Use elastic products rated for large joint movement and freeze–thaw. Correct backer rod size prevents three-sided adhesion. Proper tooling sets the profile so the bead flexes without tearing.
Hardware and fasteners
Choose hot-dip galvanized or stainless to avoid corrosion stains. Isolate dissimilar metals where possible. Back out and reset fasteners that have loosened as logs have seasoned.
What a Typical Mountain Village Project Could Look Like
South-facing ski-in/ski-out home
A slopeside home that bakes in afternoon sun would likely need a full surface reset. That means media blasting to sound wood, borate treatment on lower courses and log ends, two coats of color, and a compatible UV clear. Re-chinking at movement joints and a careful deck-to-wall detail round out the plan.
Cedar-accent cabin near the golf course
A cabin with cedar railings and gray weathering would probably benefit from a strip-and-brighten, targeted sanding, and a penetrating stain system. Expect trim rebuild in splash zones and thorough end-grain sealing on posts and stair stringers.
Timber-frame hybrid near the gondola base
A hybrid with timber posts and log accents could often be restored with selective blasting on failed elevations, color blending to match existing tones, and spot chinking where gaps have opened. Deck refinishing brings horizontal surfaces back into the maintenance cycle.
Maintenance Plan for Long-Term Protection
0–12 months after restoration
- Rinse dust and pollen in late spring.
- Check south and west walls for early UV wear.
- Seal any new checks that open past the first knuckle.
Years 2–3
- Touch up hot elevations before color fade gets obvious.
- Inspect chinking adhesion at corners and around windows.
- Refresh deck coatings to stay ahead of flat-surface failure.
Years 4–5
- Wash, light brush, and renew the clear or color system as specified.
- Repeat borate on vulnerable zones if the system allows.
- Document any settlement or movement and reseal as needed.
Simple homeowner checklist
- After big storms: look for splash marks, icicles, and wind-driven wetting.
- Spring thaw: inspect deck-to-wall areas and lower log courses.
- Late fall: seal fresh checks and clear debris from roof valleys and gutters.
Budgeting and Project Planning
What drives cost here
- Access and slope. Containment and staging take time on steep lots.
- Prep method. Full media blasting costs more up front and saves later cycles.
- Repair volume. Log-end replacements, fascia rebuilds, and trim work add scope.
- Home size and elevation count. Tall walls and complex massing increase labor.
Phased work for large homes
When a full reset isn’t in one season’s plan, we phase. Start with south and west walls that take the brunt of UV. Address lower courses and deck details next. Schedule remaining elevations in the following window so finishes age together.
Permits and HOA considerations
Confirm stain colors with the HOA before we start. Work hours and containment rules vary by neighborhood. We plan quiet tasks during peak visitor times and time coatings around mid-day gondola traffic and afternoon storms.
Local Context and Neighboring Areas
Mountain Village connects to Telluride by gondola, which means different exposures only minutes apart. Homes tucked into canyon shade see less UV but hold more moisture after storms. Open slopes in Mountain Village take stronger sun and wind.
If you split time between Mountain Village and nearby towns, climate shifts affect maintenance timing. Work windows often open earlier in Placerville’s lower valley. For reference, many owners also watch conditions in Telluride, CO and plan stain touch-ups to align schedules. A place out toward Placerville, CO might dry sooner in spring, while a cabin south along the highway near Rico, CO sees colder pockets and frequent wind. Trips over the pass toward Ouray, CO remind you how quickly exposure changes with aspect and elevation. If your route takes you through Ridgway, linking projects across properties can make sense; you can read more on Ridgway, CO timing and conditions.
Many owners source gear or schedule errands in Montrose. That larger service hub helps with planning, but finish selection and timing still need to match Mountain Village conditions.
FAQs for Mountain Village Homeowners
How often should I restain at this elevation?
Expect light maintenance every 2–3 years on south and west walls, with broader refresh cycles in the 4–5 year range if you keep up with washing and touch-ups. Lighter colors in strong sun may need shorter intervals.
Can you work around gondola-season crowds and HOA rules?
Yes. We stage equipment and containment to keep paths clear and plan quiet tasks during busy hours. We follow HOA color approvals and work windows.
What stain colors last longer in strong sun?
Mid and deeper tones with more pigment tend to hold UV better than very light shades. Pigment is your sunscreen. We balance appearance with longevity so touch-ups blend cleanly.
Do you blast every time or can you maintain an existing finish?
If the current system still bonds, a wash, light brush, and recoat keeps momentum. We recommend blasting when the film has failed, the wood is gray under the surface, or new color goals require a reset.
How do you handle wildlife-safe work practices?
We secure waste, keep food off the job, and stage materials so they don’t attract animals. We choose products and cleanup methods that respect waterways and landscaping.
What You Can Do Now
Quick 10-minute inspection
- Walk south and west sides at mid-day. Look for dull spots and peeling edges.
- Press lightly on lower logs and sills. Probe any soft areas.
- Scan deck posts and stair stringers for end-grain darkening.
- Note open checks wider than a nickel.
Send photos for a fast read
Share a wide shot of each elevation, close-ups of trouble areas, and a few log ends. Include any spots where snow piles against the wall or where icicles form.
Plan your season
Spring fills fast. If you want a full reset, book early. If you only need touch-ups, we can target the hot walls first and schedule the rest as weather allows.
Why Mountain Village, CO Homeowners Choose a High-Country Process
Durable prep → better adhesion
Prep is everything. Clean, profiled wood lets coatings bite and hold through long winters and bright summers.
Breathable coatings that move with logs
Breathable systems shed water yet let vapor escape. That balance reduces blistering and early peel on sun-baked faces.
Clear scope, timing, and maintenance
You get a wall-by-wall plan, cure-aware scheduling, and a simple maintenance calendar you can follow each year.
Ready to protect your Mountain Village log home?
Head to the bottom of this page to connect with Pencil Log Pros. Share photos, tell us your goals, and we’ll map a plan that fits Mountain Village conditions and your schedule.